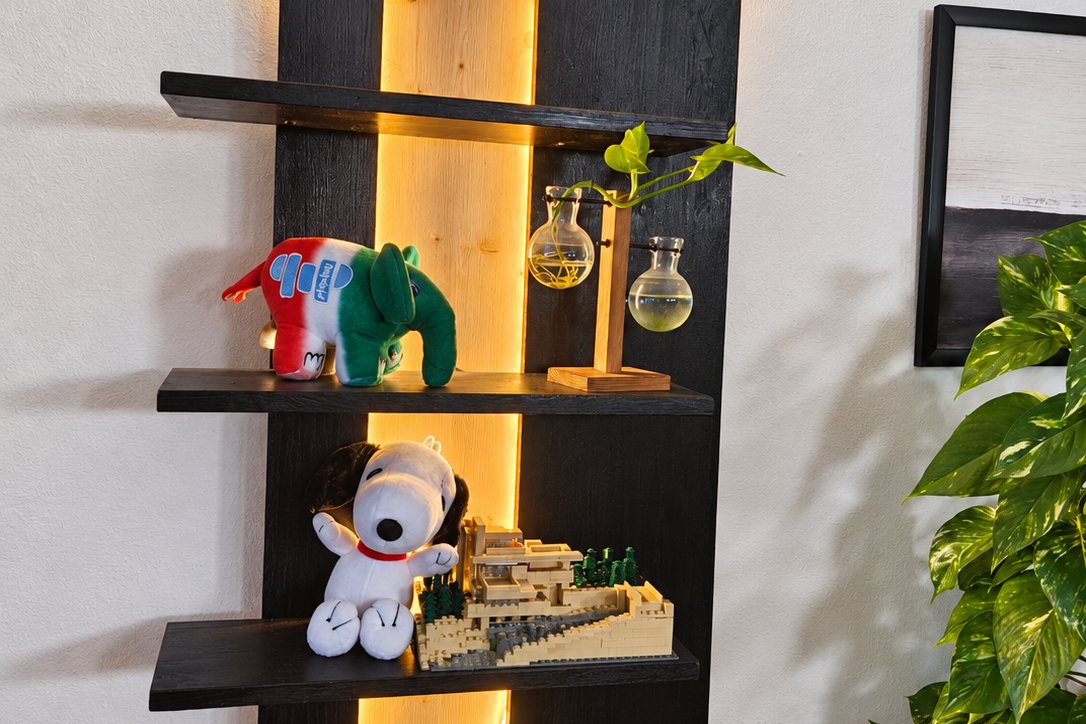
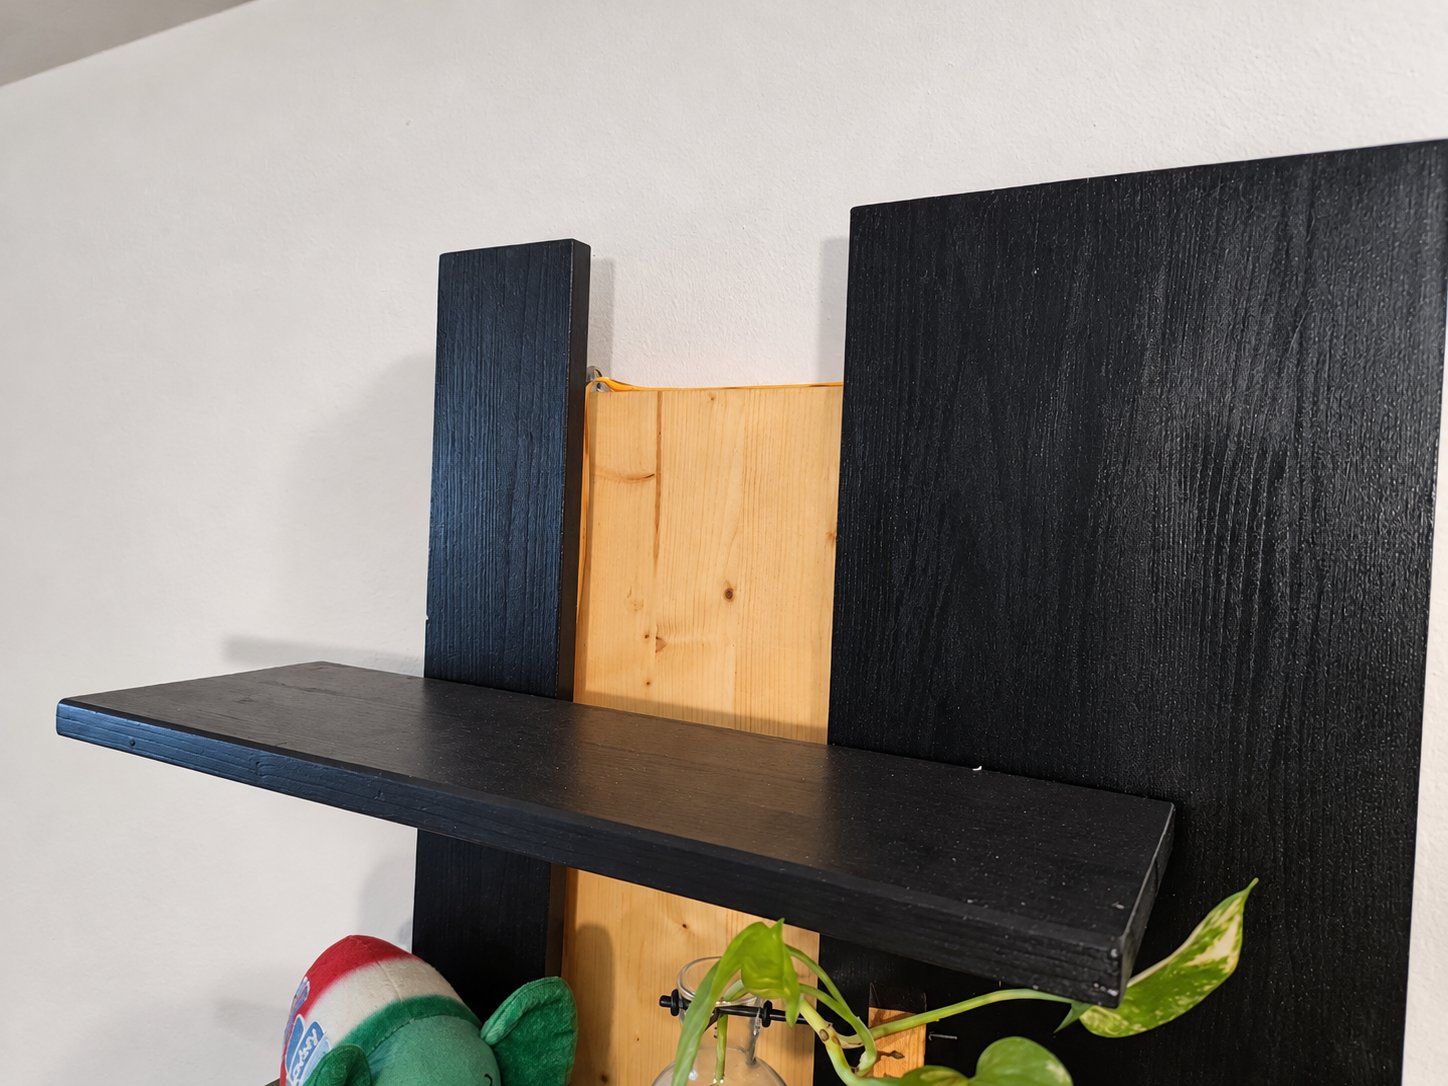
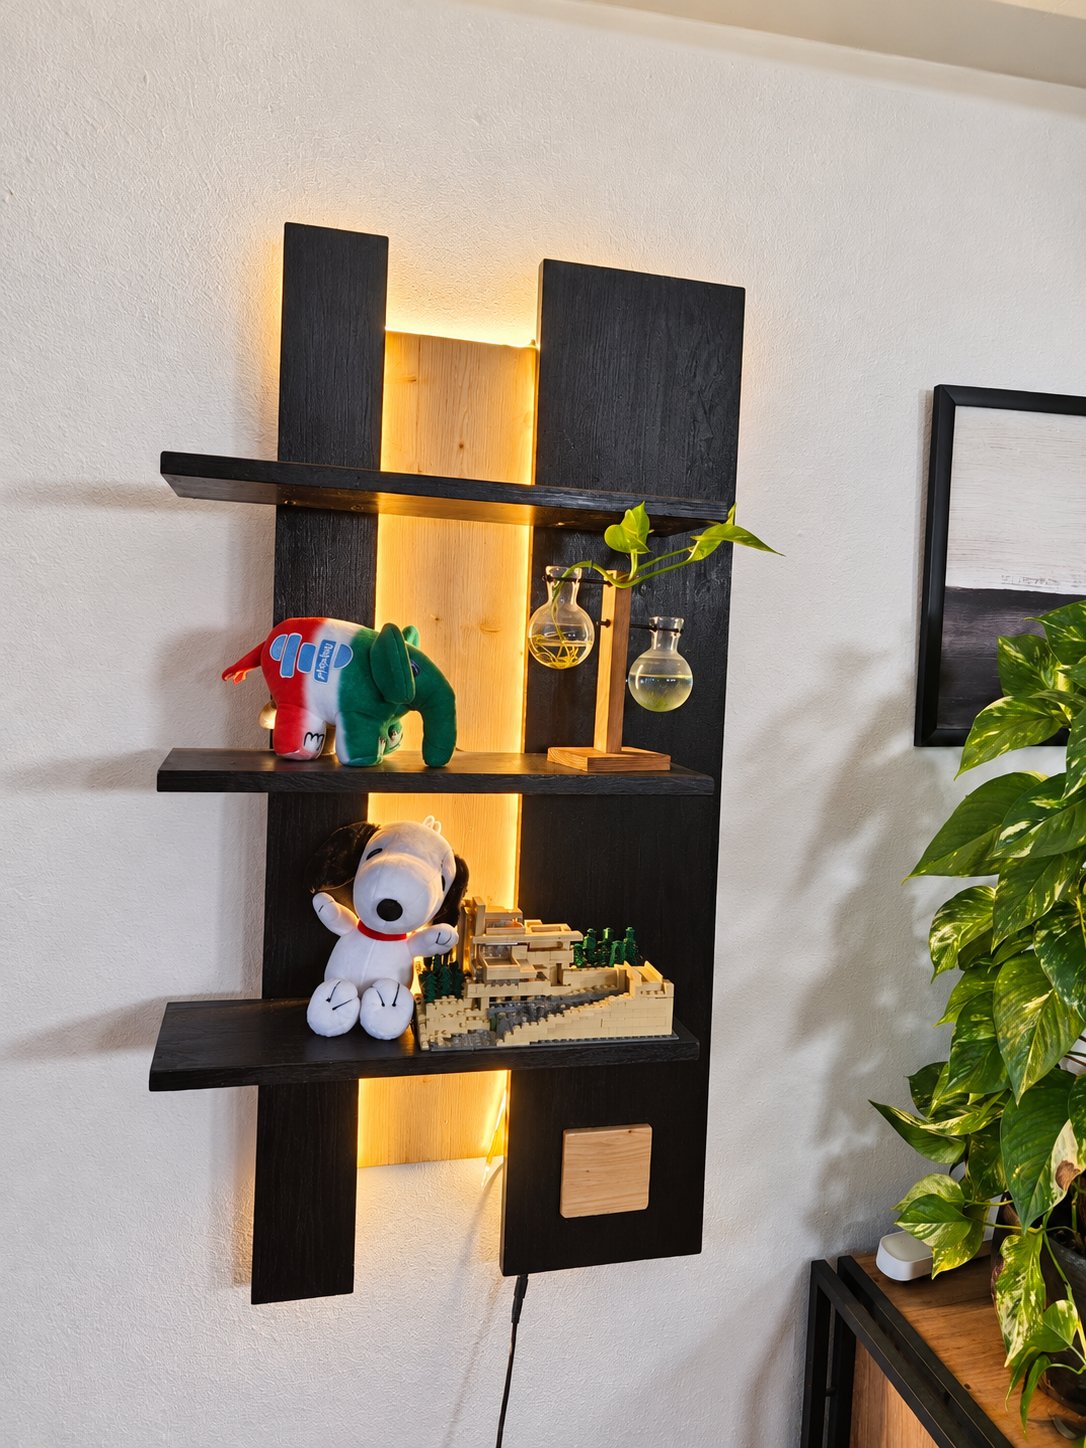
This is a wall shelf with a warm LED light hidden behind its centre panel. A small wooden tile on the right upright works as a touch switch: tap it and the light fades on, tap it again and it fades off.
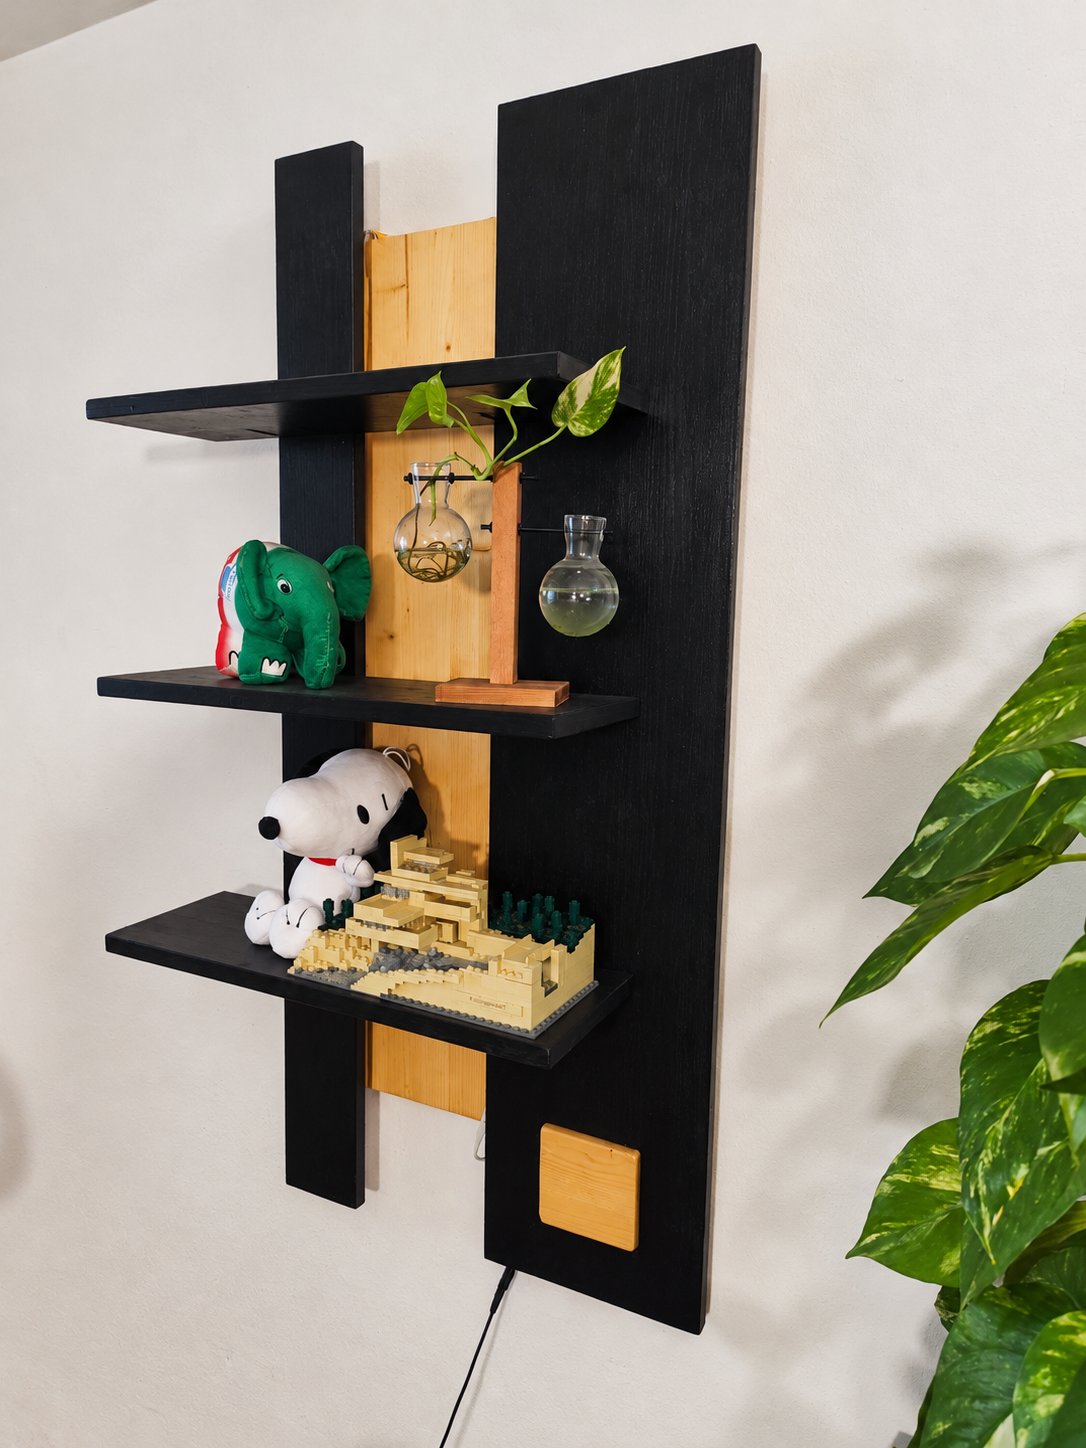
The design is a reproduction of the KITZBÜHEL #124 shelf sold by Massiccio Mobili 24. The original is solid wild oak with a black lacquered and oiled finish, it already has an LED light with a touch sensor, it weighs 16 kg and it is listed at €349.90. I kept the shape and the light, and changed the material: everything comes from one panel of 19 mm (3/4") pine. The total cost was less than €50.
Measurements
I took the measurements from the product page, which publishes a drawing with all the main dimensions. The shelf is 110 cm high and 58 cm wide overall, and it stands 21.5 cm off the wall.
- right upright: 110 × 23 cm
- left upright: 110 × 10 cm
- gap between the uprights: 15 cm
- centre panel: 90 × 21 cm
- shelves: three, 50 × 16 cm, spaced 24 cm apart, the top one 29 cm from the top of the left upright
- touch tile: 8.5 × 8.5 cm
The shelves start 10 cm to the left of the left upright and end 8 cm before the right edge, which is where the 58 cm overall width comes from.
Cutting everything from one panel
I bought a 200 × 80 cm panel. A 200 × 60 cm panel could be enough, but only if the cuts are clean: the layout below leaves about 1 cm of spare width after the long rips, so there is no room for a cut that wanders or needs trimming.
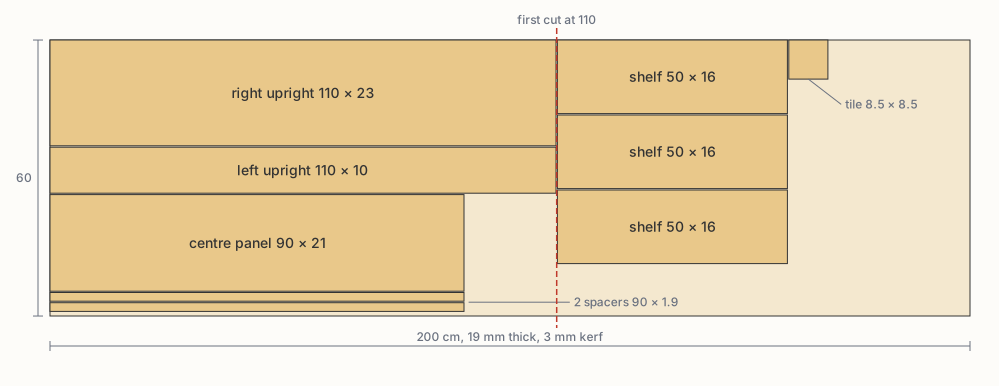
The first cut is a crosscut at 110 cm. The 110 cm piece is ripped lengthwise into the two uprights, the centre panel and two 1.9 cm spacer strips; the centre panel and the spacers are then trimmed to 90 cm. The remaining 90 cm piece gives the three shelves and the tile.
The parts cover about 8,300 cm² of the 12,000 cm² panel. That is about 15,800 cm³ of wood, so with pine at roughly 450 kg/m³ the shelf weighs around 7 kg, less than half the oak original.
How the light is hidden
Hiding the LEDs was the hardest part of the build. The light must reach the centre panel and the wall around the shelf, while the strip itself stays invisible from the front.
The solution is in the layering. The centre panel sits against the wall and is wider than the gap between the uprights, so each upright overlaps it by 3 cm. Between the centre panel and each upright there is a spacer strip, 1.9 × 1.9 cm, glued and screwed. The uprights rest on the spacers and stand 3.8 cm off the wall, which is also what makes them look like they float.
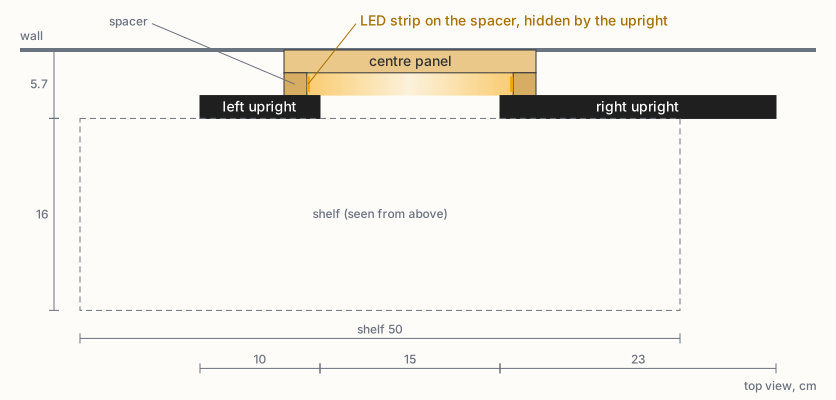
The LED strip is glued to the inner face of each spacer, facing the gap. The spacers are set about 1 cm back from the inner edges of the uprights, so the uprights overhang the strip and cover it. The light hits the recessed pine at a low angle, spreads along it, and leaks out around the edges of the uprights onto the wall.
The strip is a cuttable 12 V warm-white LED strip, 2 m long (the one I used). Two pieces of about 90 cm, one per side, use almost all of it. It runs from a 12 V power supply.
The touch tile
The switch is a 12 V touch switch module (this one) that also handles the fade. A tap turns the light on with a soft ramp, another tap turns it off the same way. There is no brightness setting: it is either on or off.
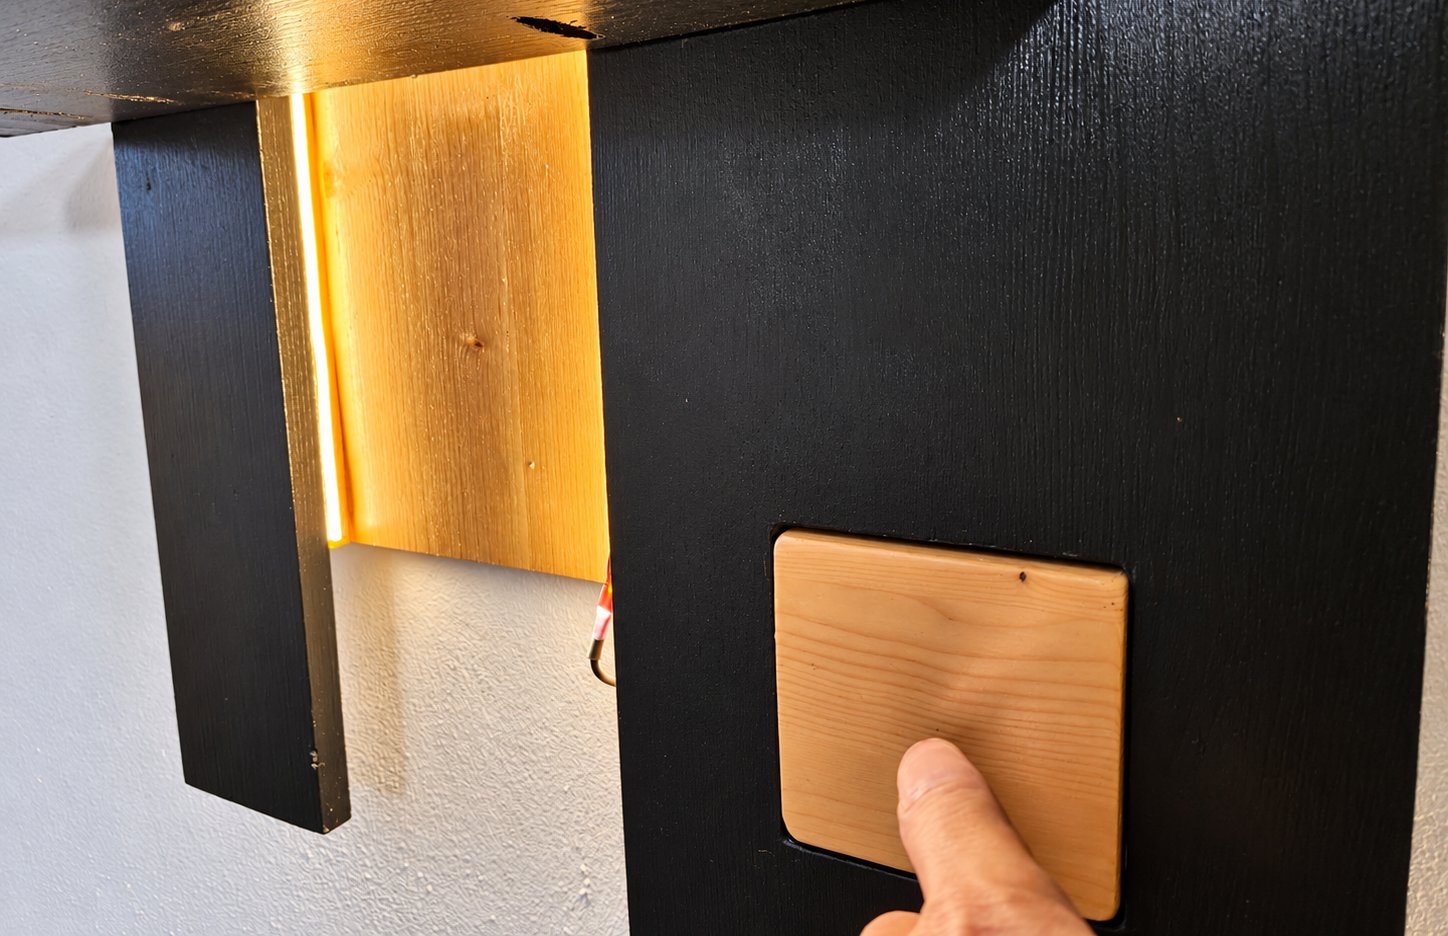
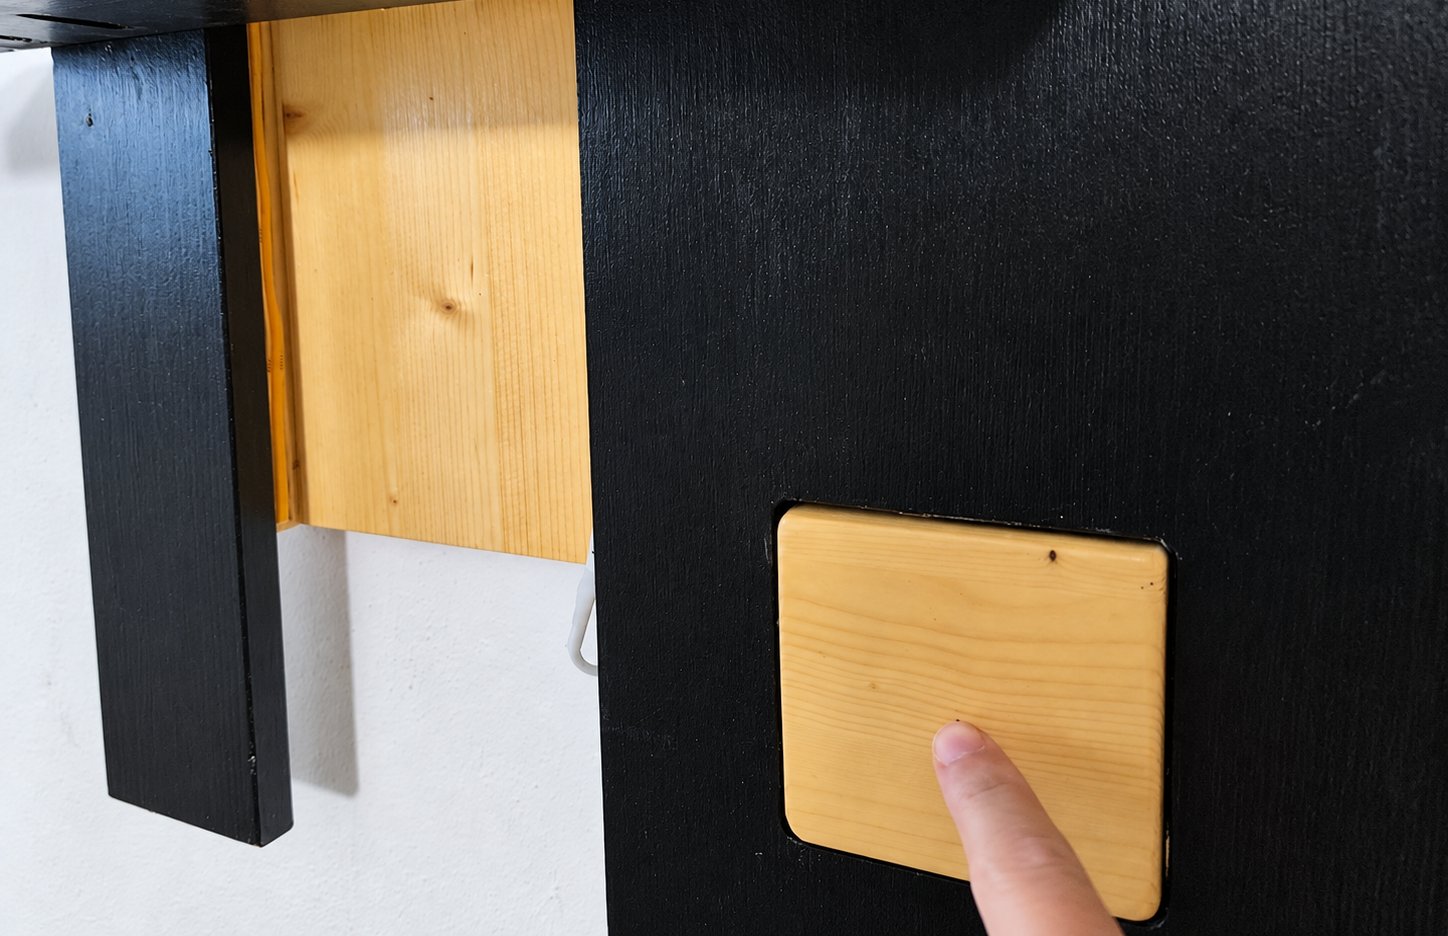
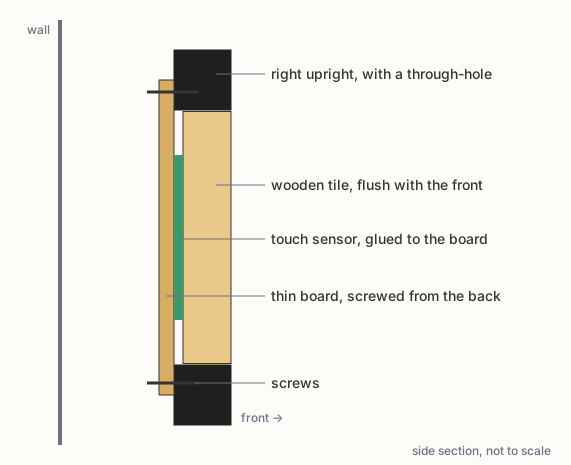
The right upright has a square through-hole. The tile sits in the hole, flush with the front. Behind it there is a thin board, screwed to the back of the upright, that holds the tile in place. The sensor is sandwiched between the tile and the board, and it is glued only to the board. The board fits in the 3.8 cm gap between the upright and the wall, so nothing shows from the front or the sides.
The sensor reads the finger through the tile, so there is nothing to see on the front: just a square of natural pine on a black panel.
Finish and assembly
I finished every piece before assembling anything. The uprights and the shelves got black enamel; then everything, including the natural pine of the centre panel and the tile, got a wood impregnant with a wax finish. Painting the parts separately keeps the line between the black and the natural wood clean, which would be hard to do on the assembled shelf.
The shelves are screwed to the front of the two side uprights with pocket holes from below, so the screws are not visible from a normal viewing height. The whole shelf hangs on concealed cabinet hangers.
The tools are the usual ones for a panel build: a circular saw or track saw for the cuts, a pocket-hole jig, a jigsaw or a router for the tile hole, a drill and a sander.
The cable
The power cable is the one problem I have not solved. It comes out of the bottom of the right upright and runs down the wall to the socket, and you can see it in the photos.
A battery is the other option. A 12 V strip of almost 2 m draws a few watts, so a battery pack small enough to hide behind the shelf would need recharging often. If you have a cleaner solution, write to me: I would like to get rid of that cable.
Get the next posts by email
An occasional newsletter with my new Posts, with one-click unsubscribe. How I handle your address.